Showing posts with label food. Show all posts

Saturday, March 21, 2015

And In the Mornin'.....I'm Makin' Waffles!! Heart Shaped Waffles to Be Exact!

My apologies to the movie franchise, but I just couldn't resist!

So today is day 147 for Tulip and Star, and we are waiting on pins and needles..........ok, maybe just me, but I'm really excited for these babies to get here and very thankful to my Savior that He allowed them to wait possibly until the weekend when I'll be home from work..........of course they may not kid until next week, but I'm remaining optimistic!

I got up this morning and went out to do chores, then came in and decided that waffles were on the menu for breakfast!

So I got out my trusty waffle iron and got to work!


The Man and I bought this at an antique store a long while ago.  I paid a lot for it, but it's been worth every penny and will still be in condition to make waffles looooong after I've gone home to my Lord!

So first thing you do is set your waffle iron down on your burner and turn it on medium low heat....

Then once it's good and hot, like it will sizzle if you throw a couple drops of water on it, you take a pastry brush or something and grease it really good with lard or bacon grease.  I'm using bacon grease this morning.


Then you put your batter in your hot, greased waffle iron.

And you close the lid.  Here comes the first disclaimer.  See that little white bubble of batter?  That is because I put too much in the waffle iron and it bubbled out.  Not a big deal, but if you way over fill it, you can quickly have a bit of a mess on your hands!  Let this cook for about 3-4 minutes, depending on how you like your waffles done, and then you grasp the handles and quickly flip the whole shebang over to cook the other side, which brings me to the second and most important disclaimer...


There is a VERY real danger of fire with this type of operation.  When you are greasing the waffle iron and when you flip it, the grease can drip down on your burner and will ignite.  You CANNOT leave this unattended while you do other stuff.  You need to be standing there so if a flame spurts up you can blow it out, or otherwise extinguish it.  It happens every time I make these, and I just blow it out and keep going......

When your waffle is done cooking on both sides, you open the lid to reveal this glorious-ness!   Then you take a fork and lift the waffle out and put it in a covered casserole or on a plate to stay warm while you cook the rest of your waffles....


The you plate them up and eat them........
I recommend a couple fried quail eggs and a strip of bacon


Put the left over waffles in the freezer and you can pop them in the toaster or heat them up in the oven for next time!

Well I'm off, we have a very busy day today which I'll be blogging about this week.

Hopefully we'll also have GOAT BABIES by Sunday evening.....

Till next time!

God Bless,

Wednesday, March 11, 2015

Fried Quail......or Crispy Kentucky Coturnix!


So as some of you know, Coturnix Quail have quickly become a valuable asset to our little homestead!


Tonight we had  some for supper and I thought I'd share it with you!

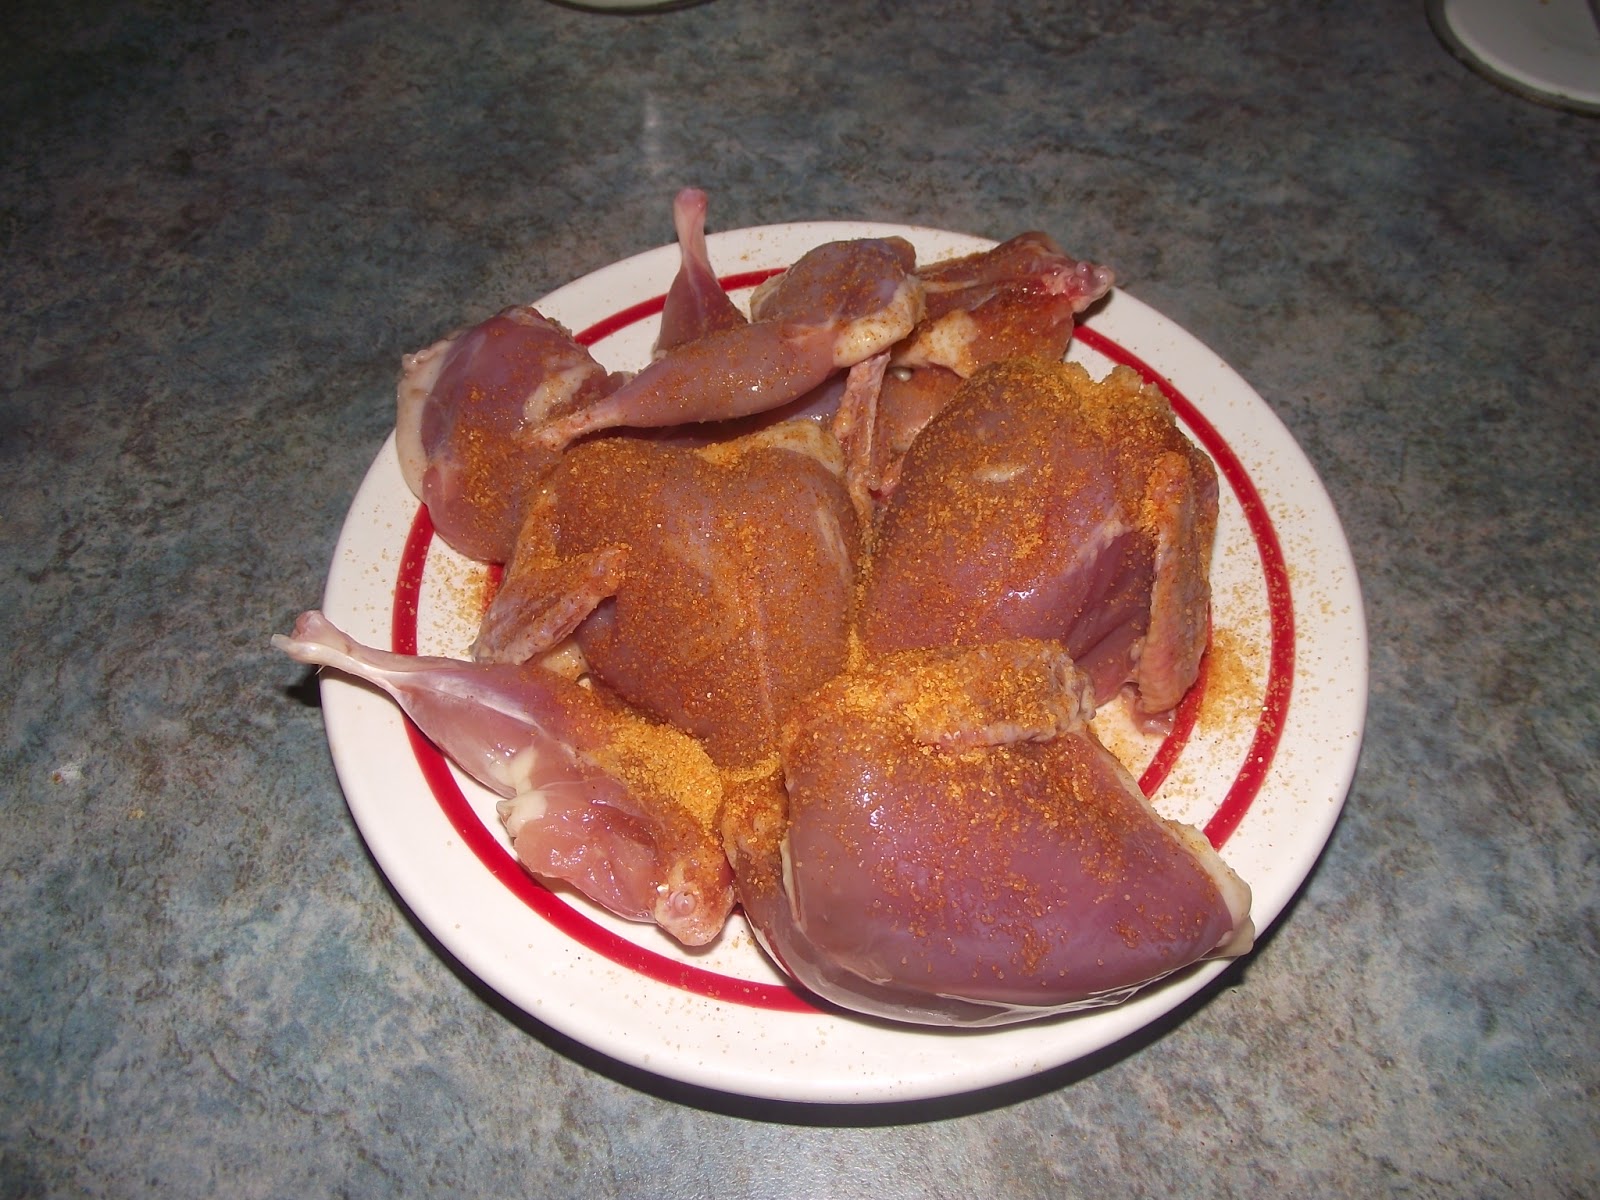
First, lightly sprinkle your quail with your favorite seasonings....


I use seasoned salt for The Man and The Youngun, and a mixture of salt and pepper for mine.  (The Man can't eat black pepper)

Then I beat up some egg and milk.....


Then slosh the witty bitty quail around in there.....


Then shake them up in a bag or toss them in a bowl of flour that you've lightly seasoned with some seasoned salt.....or salt and pepper, or whatever is your favorite...


Then do it again.....Double dipping isn't strictly necessary, but it does make for more of the yummy coating....


Then drop them in some hot lard......


Until they look like this....


They'll pretty well float when they are done and it doesn't take long.  If you remember I don't time anything, so I'm not sure how long....

And then I like to put them in a covered casserole, in a hot oven, for about 15 minutes or so....again, that's just a ballpark, pretty well while I finish up the rest of supper....


Then you should totally make yourself some milk gravy to go with it...

First put some yummy grease of some sort in a pan.  Bacon grease, pork fat, whatever...If you fry your quail in a skillet you can use the drippings from that.  Since I deep fried my quail tonight, I'm using the leftover grease that I fried pork chops in last night.  That's why I don't wash my pans...you never know when you might need to scrape some yummy stuff off............BAHAHAHAA!

Anyway, back to making the gravy...

Put your grease in a pan and get it hot, not smoking, but hot....


Then dump some flour in there...how much depends on how much grease you are using.  This is sort of a learned skill when you don't measure, which I don't...ever.....

Now whisk that up until it's nice and smooth and bubbly.....


Then add some milk, it's better to use not enough than too much....if your gravy is too thick, you can whisk and thin it down with more milk.....if it's too thin, it's much harder to get it thickened up without it becoming lumpy and like wallpaper paste......


Then turn your heat to medium low and whisk while you are finishing up the rest of supper.....you can stop every once in a while if you need to do other things, but come back to it often and stir, watching for it to start to thicken....


Then you are ready to eat!!

Fried Quail, Mashed 'Taters with Homemade Milk Gravy and home canned Baked Beans!


When thou hast eaten and art full, then thou shalt bless the LORD thy God for the good land which he hath given thee.  Deuteronomy 8:10


I can't tell you how thankful we are to be the stewards of this little piece of land and these animals.  We are so blessed!!  

Till next time.......


Sunday, February 15, 2015

Canning Turtle...........Or Snapping Turtle is Food Too!

Umm...excuse me?  Did she just say canning TURTLE?

Yup I sure did!  We love to fish for catfish, and where we live, when you love to fish for catfish, you usually catch a few catfish and a whole lot of snapping turtles.

But that is totally ok, because turtle is DELISH!

So pretty much every fishing trip we come home with some of these...


And some of these......

Please do excuse my attire....I would NEVER go out in public in this state of affairs, and probably shouldn't be putting a photo on my blog.....
So how in the world do you reduce a snapping turtle to food you ask?  

The first, FIRST thing you do is make sure it's a regular old snapping turtle and not an alligator snapping turtle.  Regular ones are legal to take here where we live but Alligator Snappers are protected and shouldn't be harvested for any reason!

First thing you do is put the turtle in a tub (nice and deep and with a cover over it because they WILL climb out of things that you cannot imagine they could ever get out of.

We usually keep them in the tubs, in the shade, changing the water every day, from one weekend to the next.  We also put them one turtle to a tub because they will fight.....we've had them get each other bloody in the boat bottom together, so you really don't want to put them in a tub together for a week!

Then you fill the tub with enough clean water to cover the turtle.....

This is a snapping turtle in the bottom of a trash toter....the big ones that they give you from the trash company....it's a REALLY big turtle...
Then you change the water every day.  This is how you "clean out" a turtle.

The water will get disgusting.  I mean.....for real.....super gross, which is why you do it.  You want the turtle to be as clean as he can be when you process him.

Then we process them.  Processing a turtle isn't for the faint of heart, but it is pretty quick and not that difficult.  We hang them up and skin them, and then cut the meat away from the shell.  There is some really delicious meat up between the spine and the shell, the turtle "back strap" if you will.  We slice that and fry it up fresh, but the rest of the meat gets soaked in salt water, and then de-boned.  Then I either can it right up, or freeze it to can later.

We also don't let the shell go to waste.  The Man totally cleans the shell, skull, and claws.  He then seals them with a coating of shellac and then we sell them or give them away.

This isn't the best picture of the turtle shells, but it's the only one I can find!
Lest you think we've been doing a lot of fishing, we haven't.  This de-boned turtle meat has been resting in my freezer until I had time to can it.  I got it out of the freezer last night and after a wonderful, uplifting church service today, I'm canning it up!

So the first thing you do is put your de-boned turtle in a stock pot and cover with water.

Bring it to a boil and boil for about 10 min or so....

Then pack your hot turtle meat loosely in a wide mouth quart jar, and top with your hot cooking liquid.  You can add 1 tsp of pickling salt if you'd like.

Wipe the rim clean and do all the good stuff you are supposed to do when you can, then put on a simmered flat and ring, and process for 90 minutes at whatever weight your altitude calls for (11#'s where I'm at).

Then you take them out and wait for the "ping"!


And that's how you can turtle!

What do we do with that canned turtle you ask?

Well stay tuned for a blog post entitled...

Hot Turtle Bites Served Hot

To find out!

Until next time............as the preacher said today......Grow and Glow in the Lord!!


Sunday, January 11, 2015

Pressure Cooker Ribs - Goodwife Style!

Tonight's supper was BBQ spare ribs (from our home raised pigs), parsley potatoes, leftover corn, and deviled quail eggs.  So here we go!

First, season your ribs up your favorite way.  I just used a bit of seasoned salt....


Then heat a dab of lard (home rendered of course) or oil in your pressure cooker pan.....


Then brown your ribs just a dab, not a big deal how much you brown them.  I sometimes even skip this part....


Now add some water to your pan, about half way full....


Now put your lid on your cooker, and turn your burner up until you see steam coming out the top.  Once you've got steam coming out, put your jiggler on.  Then when your jiggler is dancing around, start timing.  You are gonna cook these for 35 minutes....


Meanwhile take you some lovely red potatoes (or any kind of potato will do) wash them off and cut them into chunks...


Add a little salt and cover them with water, and put on the stove to boil until nice and tender..I always add salt when boiling potatoes.  It just doesn't work to add the salt after, as it just sort of sits on top and doesn't bring out the flavor of the potato...


All is cooking away.  Now The Man and I took this opportunity to hop in the shower, while The Youngun kept an eye on things...


After your ribs have been cooking for 35 minutes, you can force cool your cooker by putting it in the sink and running cold water over it.  If you aren't in a hurry you can just take it off the heat and wait for it to cool down on it's own.  WHATEVER you do, DO NOT take the jiggler off until the little "pin thingy" goes down.  If you take it off before it goes down, you'll have an "explosion" of steam come out!


Now you are going to lift your ribs out and put them in a baking dish.  Be careful because they will be so tender they'll fall right apart....


While I was getting stuff all set, The Man wandered into the kitchen with this....


It's very precious and sexy to watch a big strong man cuddle a tiny little quail.....just sayin'...
Ok, back to supper....
Now top those cooked ribs with some sliced onion.  We eat onion in everything, so if you don't like onions, this is for sure optional...


Now slather your favorite bbq sauce over top.  I make my own out of ketchup, Sweet Baby Rays, brown sugar, and chipotle pepper....and stick this in the oven under the broiler.  This will sort of caramelize your sauce and make it nice and sticky on your ribs....


While they are getting nice and sticky in the oven, drain your 'taters, and put in some real butter and dump some parsley in there.  I used dried parsley....and then put a lid on the pan so the butter will melt....


And here is our pan of hard boiled quail eggs.  We need to get those peeled while the ribs are in the oven and the butter is melting in the 'taters.....


Then we'll devil (some folks call these dressed eggs) the eggs.....


And now our ribs are done, all sticky and gooey....


And our butter has melted, so we stirred them all up good....


And now we are ready to eat!!  Yummy, yummy, yummy! 


For every creature of God is good, and nothing to be refused if it be received with thanksgiving.  For it is sanctified by the word of God and prayer.
1st Timothy 4:4-5

Until next time.....God Bless!

Wednesday, December 10, 2014

Make Your Own Frozen Burritos....Goodwife Style!

So, The Man, every once in awhile, likes to eat one of those frozen burrito type things.


  You know, you buy them in the frozen, fake food section of the grocery for 89 cents?  And they are always hard and so hot on the ends that they burn all the flesh off the roof of your mouth, and frozen in the middle?  They are full of who knows what and terrible for you?  But the middle filling part is sort of tasty, you know the part that's luke warm and not frozen and not so hot that it burns your tastebuds off before you can eat it?  That part is kinda good?

He asked me awhile back (about a year ago or so) if I could make them because he was having trouble finding one that actually tasted as good as it should/could.  

So in true Goodwife fashion, I got in the kitchen and this is what we came up with.  They are good, they are tasty, and while not healthy by any stretch (probably??) they are a nice, occasional, weekend lunch!

First you need about a pound or so of some kind of ground meat.  I use pork from our piggies that we raised.....and I sprinkle it with some seasoned salt and then I nuke it with the lid on until it's done.  You can cook yours on the stove top if you'd like......


Then once your meat is done, and you've broken it up into nice small little crumbles, you are going to add in your favorite taco type seasoning.  I used a packet of the stuff from Aldi, because I'm lazy like that, but if you've got some uber secret special blend that you grind yourself, then by all means go for it!  

Then you are going to dump in some beans.  I use home canned black beans, or home canned pinto beans.  IF you are going to use store bought beans, I'd use refried beans.  The reason being, that home canned beans are MUCH creamier than canned beans from the store and you want this filling to be pretty creamy.......


So you dump your beans in a bowl and mash them up a little with a fork.  If you are using refried beans you can of course skip that step, and then you dump the beans in with your cooked, seasoned, ground meat and mix it up good.  Then you are going to dump in some shredd-y cheese.  I used mexican style from Aldi, but you can use whatever you'd like.  I'd say about a cup??  Not really sure how much, but don't use too much or it will dry your meat mixture out.....


Now, you can use whatever size tortilla shell you'd like.  I've got a hungry man on my hands, so I made super mondo burritos.....and the itty bitty ones are for me!


Then you are going to tear you off some wax paper.......


About this big in relation to your tortilla shell......


When I worked at Micky D's I opened 5 days a week and one of my tasks was to roll breakfast burritos.  I rolled around 150-200 breakfast burritos a day, 5 days a week.  After over a year of working there, I rolled literally thousands of burritos and didn't care if I ever rolled another one in my life, but consequently I became very good at it!  You'd be surprised how many people struggled with rolling burritos....


So anyway, you slap your meat on there, however much you want in relation to how big/thick you want your burrito to be.  Remember, I'm feeding a very hungry man so ours are pretty huge.
There are two ways you can fold this....the one end open style or the both ends closed style....this one I'm rolling one end open....


Bring the right edge of the tortilla up...


Then fold the bottom up and give a little tuck up there at the top to trap the meat.....


Then roll it over so the seam is down.....


Now drag it down to the corner of your paper....


And bring the corner up and over the burrito....


Fold each end in.....


And roll.......until you get to the top corner.  


Repeat with the rest of your burritos and when you've got them all neatly rolled up, put them in a ziplock bag, label and toss in the freezer!  

Total time on these, start to finish??  About 20 minutes......

I usually just put them right back into the tortilla bag, but I didn't use all the tortillas this time.

When you are ready to nuke these, I do them on defrost for about 2 or 3 minutes, then nuke them 1 minute at a time until they are done.  This prevents those hard ends and frozen middle!

You could heat these in the oven if you aren't a microwave kind of person, but I'm not sure how long it would take and I'd do them in foil instead of wax paper....

So here's the recap.....

1# ground meat (I use pork)
Seasoned salt to taste
Cook meat, making sure to crumble well...
Add 1 packet of taco seasoning
Set aside.
Meanwhile mash up some home canned black or pinto beans, or else open up a can of refried beans.  Add those to your meat mixture, then stir in about 1 cup of shredded cheese.
Assemble burritos, roll, roll in wax paper, and freeze!
To serve, heat in microwave or oven.

These are really delicious with some rice, salsa, guacamole, sour cream, whatever toppings you desire, or they are also great just by themselves!

Till next time......God Bless!